
Bookwalter Retractor System Complete Assembly Setup
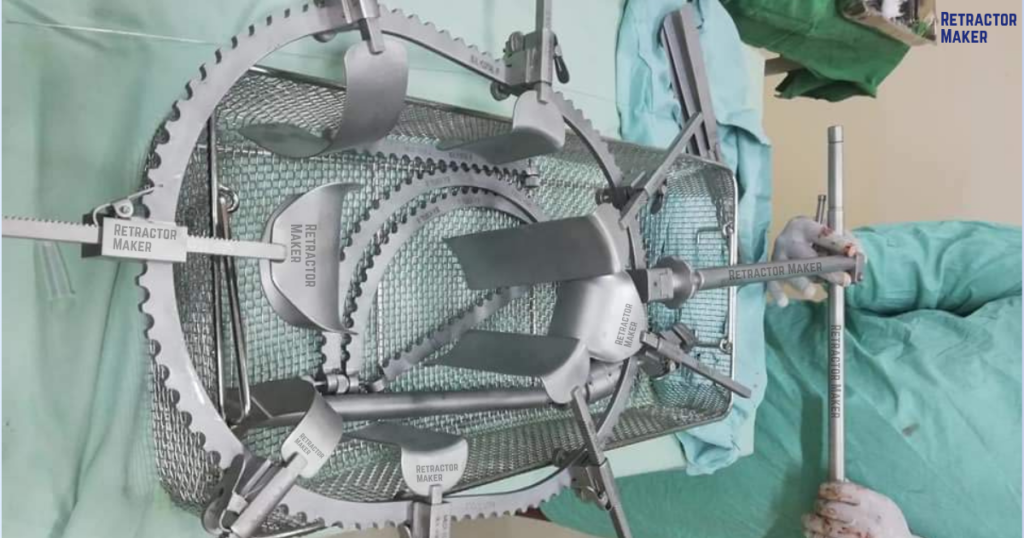
Proper setup of the Bookwalter Retractor System is critical for maintaining sterile field integrity, protecting patient tissue, and ensuring reliable surgical exposure during open operations. Setting up a table-mounted self-retaining retractor requires a systematic, step-by-step sequence—from clamping the post coupler onto the table rail to securing the vertical post, attaching the horizontal flex bar, centering the ring frame, clipping ratchets, and tensioning specialized retractor blades. This surgical guide provides operating room staff, surgeons, and central sterile processing departments with an instructional walk-through of the complete assembly process, safety checks, common setup errors, and post-operative cleaning protocols.
Introduction
In open abdominal, pelvic, urological, and retroperitoneal surgery, establishing static, clear visual exposure is a prerequisite for surgical precision. Achieving this exposure without crowding the operative site requires transferring physical retraction force away from human hands and anchoring it directly to the surgical table frame.
The Bookwalter Retractor System is designed to provide hands-free, 360-degree retraction around the incision perimeter. However, because it is a modular mechanical framework made of multiple heavy stainless steel components, correct assembly and sequence are paramount.
An improperly mounted clamp can slip along the table rail, an un-leveled ring can exert uneven point pressure on the abdominal wall, and incorrect ratchet engagement can cause retractor blades to dislodge during critical dissections. Following a standardized, repeatable OR setup protocol ensures maximum system stability, reduces setup time, and maintains safety for the patient and surgical team.
What Is a Bookwalter Retractor?
A Bookwalter Retractor is a modular, table-mounted, self-retaining surgical retractor system designed to hold open surgical fields during major open procedures. Invented in the late 1970s by Dr. John R. Bookwalter, the system consists of a heavy rail clamp, vertical support post, horizontal extension arm, central ring frame, and mechanical ratchets holding interchangeable retractor blades.

By anchoring directly to the operating table rail, the system converts variable manual force into static mechanical tension, freeing surgical assistants and maintaining an unobstructed overhead view. Explore the full range of configurations in our Bookwalter Retractors Category.
Required Components Checklist Before Assembly
Before the scrub team begins mounting hardware onto the table, the central sterile processing department (CSPD) and OR personnel must verify that a complete, inspected instrument set is present on the sterile back table.
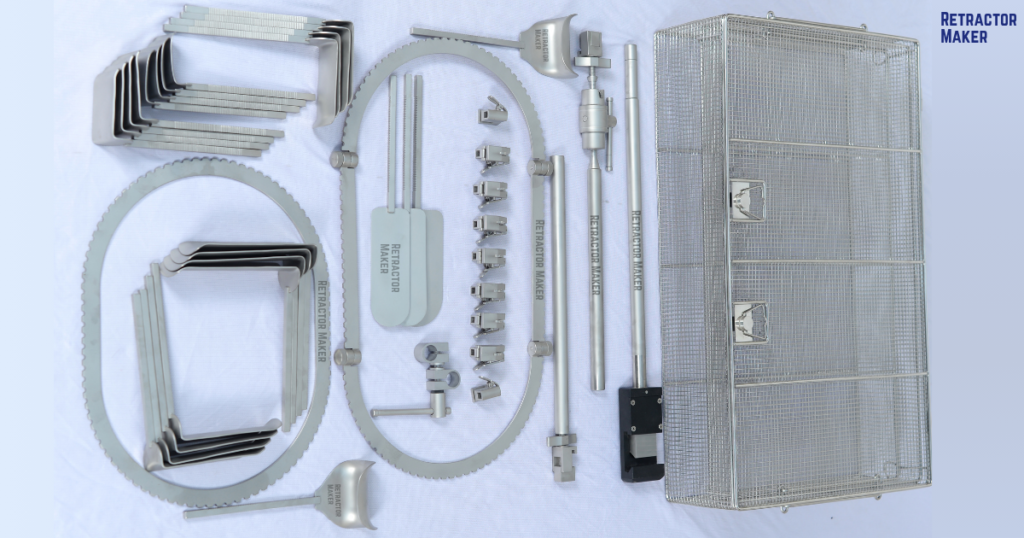
Required Assembly Component Inventory:
| Component Name | Quantity in Kit | Structural Role in Assembly |
| Bookwalter Post Coupler (Table Clamp) | 1 | Anchors the vertical post to the operating table side rail |
| Bookwalter Vertical Field Post (12″) | 1 | Solid support column elevating the framework above the patient |
| Bookwalter Horizontal Extension Bar | 1 | Provides straight-line horizontal reach over the torso |
| Bookwalter Horizontal Flex Bar | 1 | Articulated ball joint arm enabling multi-angle ring tilt |
| Bookwalter Oval Ring Frame | 1 | Solid 360-degree perimeter track matching standard laparotomies |
| Bookwalter Segmented Hinged Ring Frame | 1 | Jointed ring frame folding to conform to curved body habitus |
| Standard Slide-On Ratchets | 2 | Straight-line friction locks for 90-degree lateral traction |
| Tilt Ratchets / Rotating Tilt Ratchets | 7 | Variable-pitch ratchets enabling downward blade angle and vertical lift |
| Interchangeable Retractor Blades | 6–10 | Kelly, Balfour, Harrington, and Malleable blades with notched shanks |
| Sterilization Organizer Tray | 1 | Perforated storage tray keeping hardware sorted and protected |
Step-by-Step Setup and Assembly Sequence
Assembling the Bookwalter Retractor System follows a logical sequence from the table rail to the surgical wound. Every step must be executed methodically to establish a stable structure.
Step 1: Preparing the Operating Table Rail
Before draping or immediately following sterile drape placement, identify the optimal attachment zone on the operating table side rail.
- Location: The clamp should be positioned roughly parallel to the patient’s hips or lower abdomen on the side opposite the surgeon’s primary standing position (or adjacent, depending on procedural preference).
- Clearance: Ensure the rail area is free of IV lines, warming blanket tubing, or table control pendants. The table rail must be structurally rated to withstand lateral mechanical leverage.
Step 2: Attaching the Table Rail Clamp (Post Coupler)
The post coupler (table clamp) forms the load-bearing foundation for the entire retractor structure.
Setup Instructions:
- Open the clamping jaws of the post coupler completely by turning the primary T-handle counterclockwise.
- Place the coupler block over the sterile surgical drape directly onto the table side rail.
- Ensure the rail rests fully inside the coupler channel to guarantee metal-on-metal compression through the drape.
- Tighten the main clamping knob clockwise until firm resistance is met.
- Manual Tug Test: Attempt to slide or wiggle the block by hand. It must remain immobile.
Why This Step Matters: If the post coupler is loose or clamped over thick bunched drapes without metal-on-rail engagement, the entire retractor assembly can tilt or slide under the lateral tension of deep abdominal retraction.
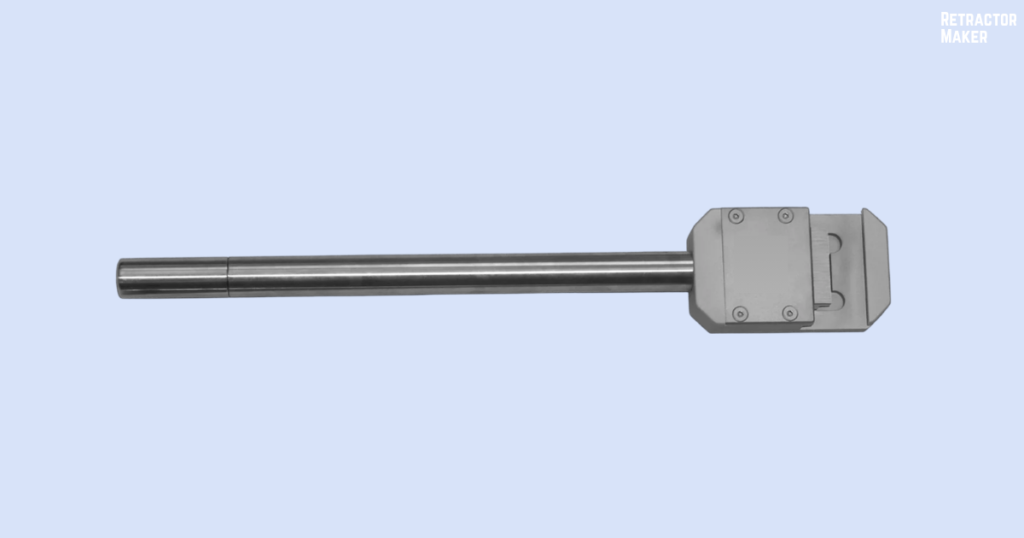
Step 3: Installing the Vertical Field Post
The vertical field post serves as the upright column elevating the overhead frame above the sterile field.
Setup Instructions:
- Insert the solid end of the 12-inch vertical field post into the top receiving hole of the mounted post coupler.
- Adjust the vertical height so the post extends approximately 10 to 14 inches above the abdominal wall.
- Tighten the post coupler’s vertical locking knob clockwise to clamp the post at the desired height.
Why This Step Matters: Insufficient vertical post height forces the overhead extension arms too close to the patient’s torso, creating pressure points or obstructing the scrub nurse’s view. Excess height creates unwanted rotational leverage on the table clamp.
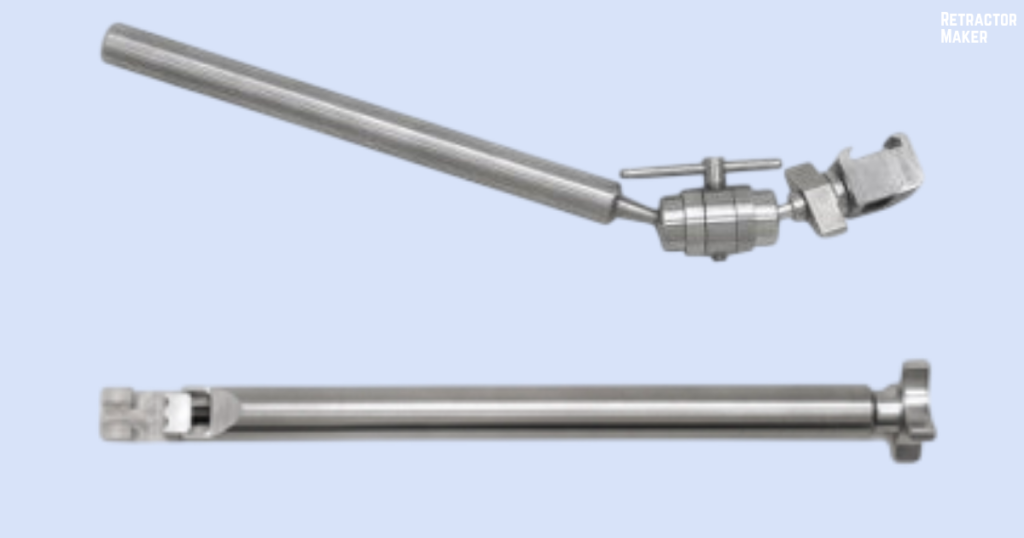
Step 4: Connecting the Horizontal Bar and Horizontal Flex Bar
The horizontal extension arm bridges the distance between the vertical post and the central ring frame hanging over the incision.
Setup Instructions:
- Slide the mounting collar of the horizontal extension bar onto the top of the vertical field post and tighten its post clamp knob.
- Connect the horizontal flex bar to the extension bar.
- Loosen the central flex bar lever to allow the articulated ball joint to move freely.
- Position the terminal clamping head of the flex bar directly over the patient’s anatomical midline.
Why This Step Matters: Utilizing an articulated flex bar rather than a rigid bar allows surgical teams to adjust ring height, tilt, and rotation simultaneously, conforming to varying patient body contours with a single handle.
Step 5: Positioning and Centering the Ring Frame
The ring frame surrounds the incision and acts as the 360-degree track for all ratchet mechanisms.
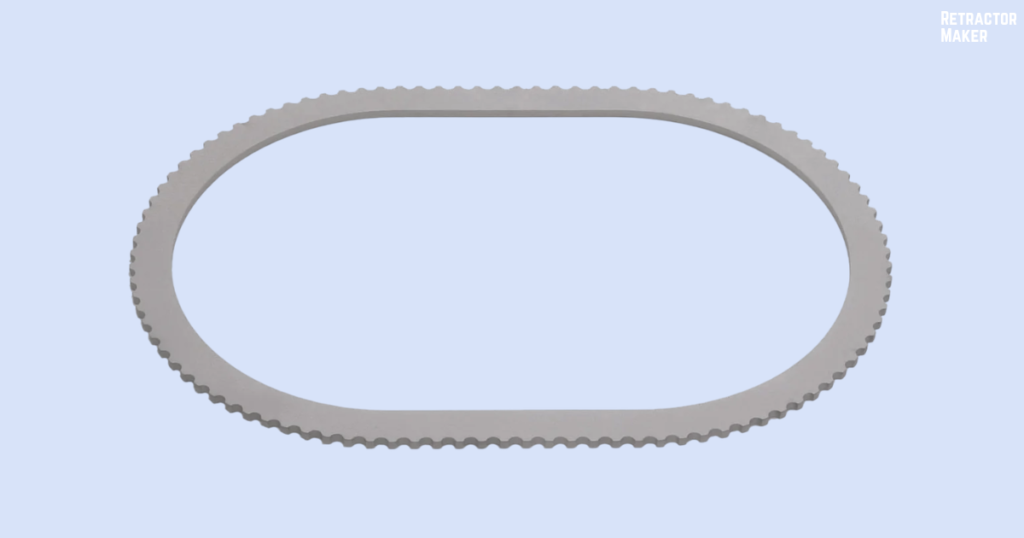
Setup Instructions:
- Select either a Medium Oval Ring (standard laparotomy), Large Oval Ring (bariatric/extended access), or Segmented Hinged Ring (non-planar abdominal wall/flank approach).
- Attach the mounting post of the ring frame into the clamping jaw at the end of the horizontal flex bar.
- Adjust the flex bar so the ring sits level and parallel to the patient’s abdominal wall, 2 to 3 inches (5 to 7.5 cm) above the skin line.
- Tighten the flex bar’s main locking lever firmly to lock the ring in a stationary position.
Why This Step Matters: Positioning the ring too high requires excessively long retractor blades that flex under load. Placing the ring too low causes ratchets and blade shanks to press directly onto patient skin, risking pressure necrosis.
Step 6: Attaching Standard and Tilt Ratchets
Ratchets connect to the ring perimeter and function as incremental friction locks for retractor blades.
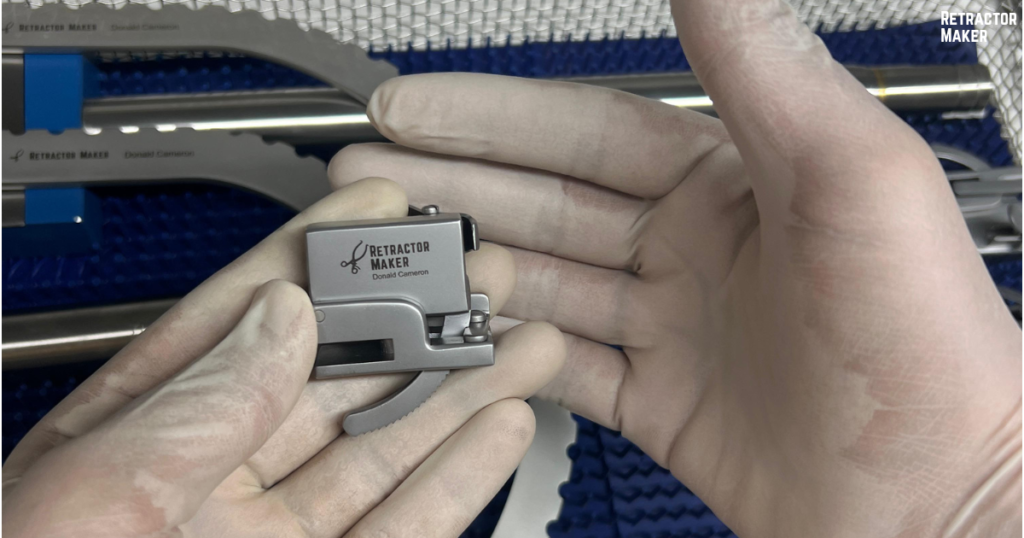
Setup Instructions:
- Select the required combination of Standard Slide-On Ratchets, Tilt Ratchets, or Rotating Tilt Ratchets.
- For Tilt Ratchets: Open the quick-release clip, snap the ratchet over the ring rim at the desired anatomical vector (lateral, superior, or inferior), and release to clamp onto the ring notch track.
- Ensure the ratchet’s blade-receiving channel points inward toward the surgical incision.
Why This Step Matters: Tilt ratchets permit surgeons to angle blade tips downward into deep pelvic cavities or upward beneath subcostal margins, providing vertical tissue lift in addition to lateral traction.
Step 7: Selecting and Installing Retractor Blades
Retractor blades engage patient tissue directly. Selecting the proper blade profile and depth depends on abdominal wall thickness and tissue fragility.
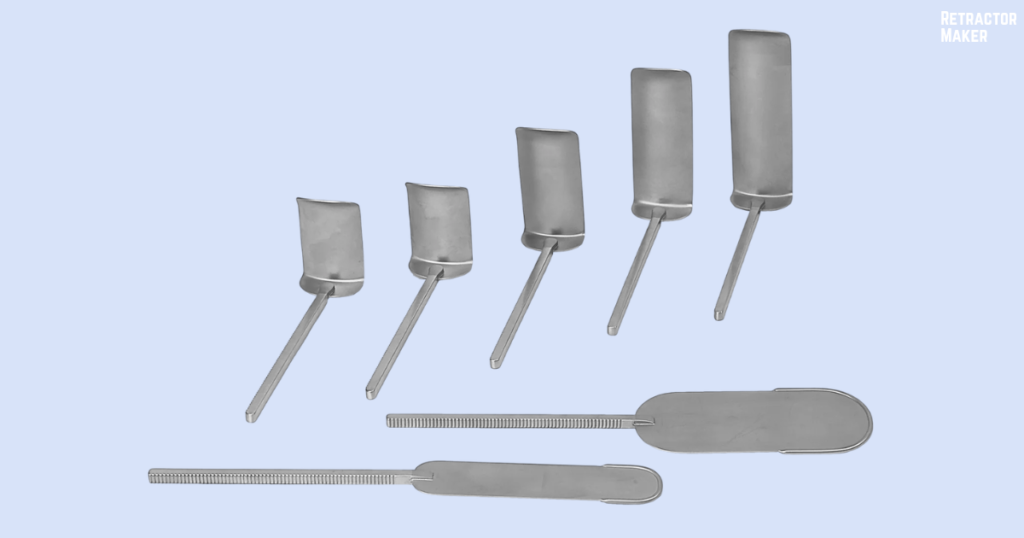
Setup Instructions:
- Select blades appropriate for the incision depth:
- Kelly Blades: Right-angle blades for muscular abdominal wall margins (e.g., 2″ × 3″ up to 2″ × 7″).
- Balfour Blades: Broad curved blades for wide fascial retraction.
- Harrington (Sweetheart) Blades: Smooth heart-shaped blades for gentle liver or organ cradling.
- Malleable Blades: Bendable alloy blades formed by hand to navigate around bowel loops.
- Insert the notched handle shank of the chosen blade into the ratchet’s receiving channel.
- Advance the blade shank through the ratchet until the working blade face contacts the tissue margin inside the incision.
Step 8: Adjusting Blade Tension for Optimal Surgical Exposure
Once blades are positioned against tissue margins, tension must be applied systematically.
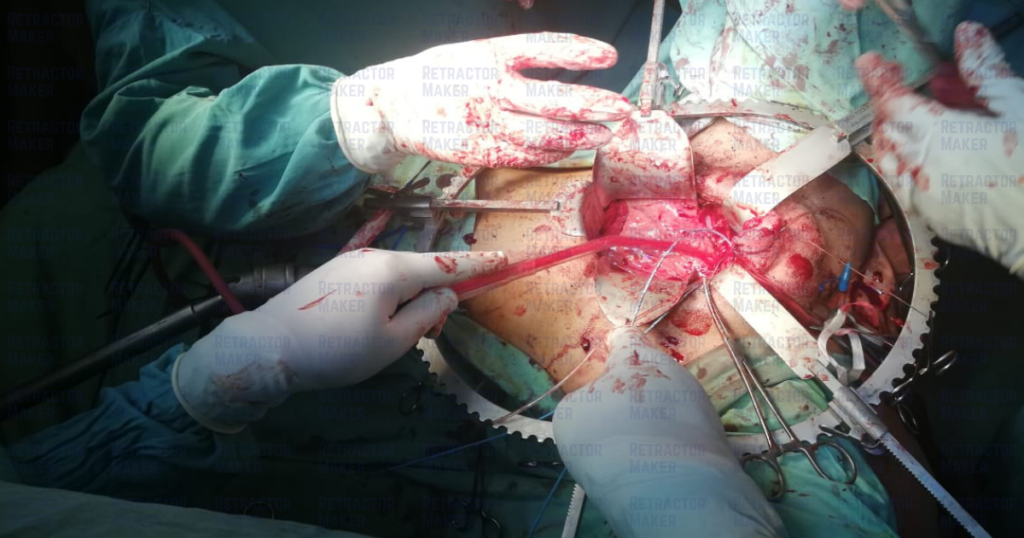
Setup Instructions:
- The surgeon or assistant pulls the ratchet handle or blade shank outward away from the incision center.
- The spring-loaded ratchet pawl drops into the blade shank notches, locking the blade incrementally under static tension.
- For Tilt Ratchets: Engage the tilt gear screw to angle the blade tip downward into deep anatomical planes.
- Balance traction forces equally across opposing sides of the ring frame to prevent tilting the central assembly.
Critical Pre-Incision Safety Checks
Before proceeding with surgical dissection, the scrub team and lead surgeon must perform a brief mechanical safety protocol.
Common Setup Mistakes and How to Avoid Them
Even experienced surgical teams occasionally encounter setup difficulties. Recognizing these common errors prevents intraoperative complications.
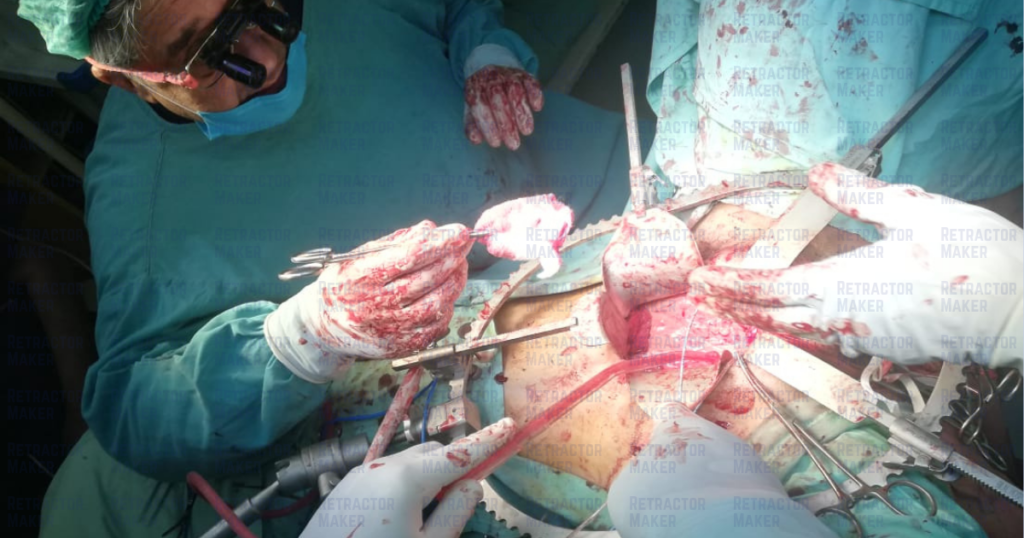
Setup Mistakes and Corrections:
- Clamping Over Loose Drapes Without Metal Engagement
- Problem: The post coupler slips along the table rail during heavy lateral traction.
- Correction: Ensure the clamp jaws enclose the rail firmly with tight metal compression through drape fabric.
- Positioning the Ring Frame Too Low
- Problem: Ratchet housings and blade shanks press against the patient’s skin, risking skin necrosis or bruising.
- Correction: Maintain a strict 2 to 3-inch clearance gap between the ring frame underside and the patient’s body wall.
- Unbalanced Tension on Ring Frame
- Problem: Retracting heavily on one side of the ring causes the framework to tilt or twist the horizontal flex bar.
- Correction: Apply opposing traction force simultaneously on opposite sides of the ring frame.
- Over-Tensioning Mechanical Ratchets
- Problem: Excessive mechanical pulling can cause muscle tearing, localized ischemia, or nerve compression along fascial borders.
- Correction: Advance ratchets incrementally only to the point of adequate exposure—never force a ratchet beyond natural tissue resistance.
Post-Operative Disassembly, Cleaning, and Sterilization
Proper post-operative reprocessing protects hardware mechanisms, prevents cross-contamination, and maintains smooth ratchet operation.
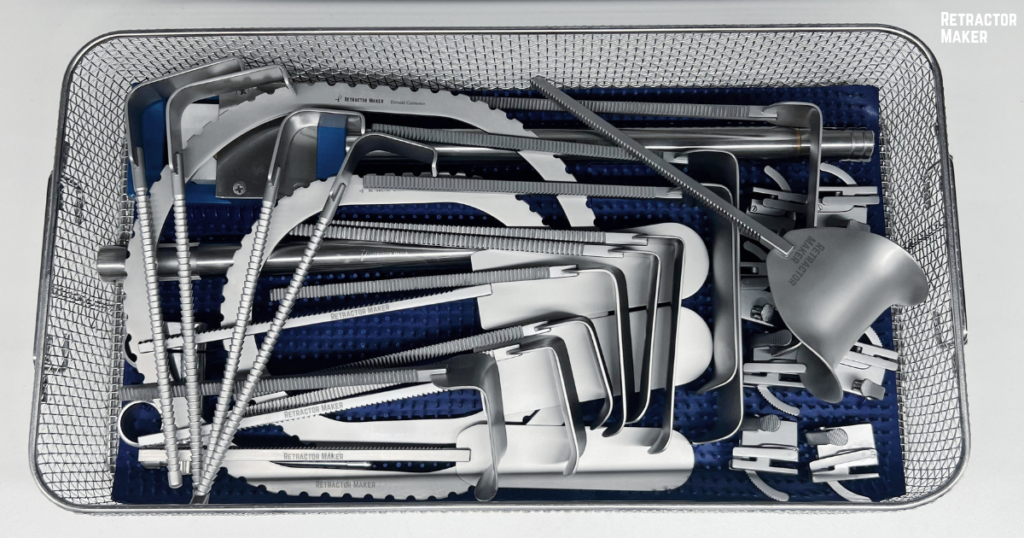
Reprocessing Protocol:
- Point-of-Use Pre-Cleaning: Immediately following surgery, wipe gross blood, fat, and tissue residues from blade faces, notched shanks, and ratchet gear channels using sterile water or enzymatic sprays. Do not allow organic debris to dry inside mechanisms.
- Complete System Disassembly:
- Disengage all blades from ratchets.
- Clip off or slide all ratchets off the ring frame.
- Detach the ring frame from the horizontal flex bar.
- Unclamp the flex bar from the vertical post.
- Loosen the post coupler and remove the vertical post from the table rail.
- Manual Enzymatic Cleaning: Submerge all disassembled components in a neutral-pH enzymatic detergent solution. Use soft nylon brushes to clean inside ratchet pawl channels, notch tracks, flex bar ball joints, and coupler thread channels. Never use steel wool or abrasive pads that scratch stainless steel oxide surfaces.
- Automated Thermal Disinfection: Process disassembled hardware through an automated washer-disinfector cycle using non-corrosive surgical instrument detergents and demineralized water rinses.
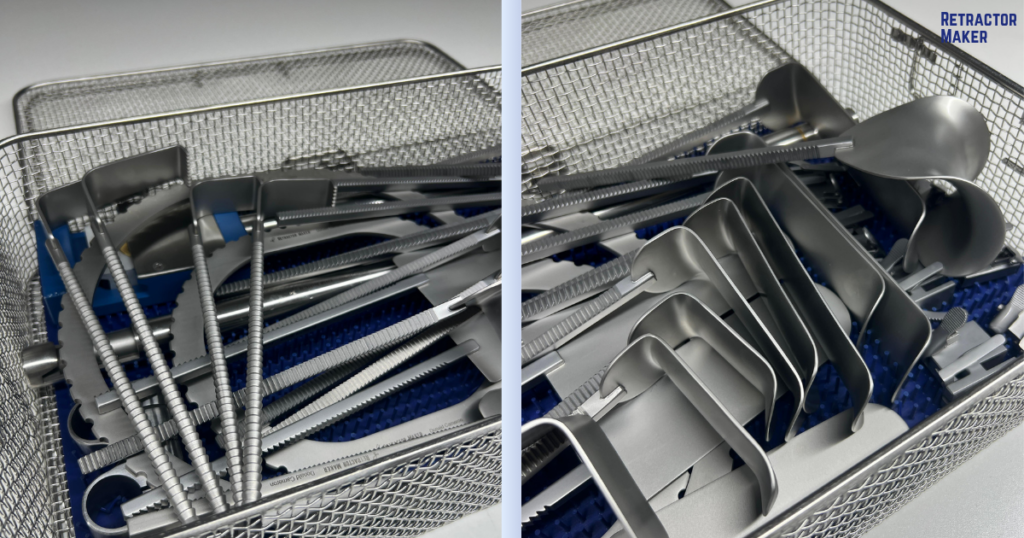
- Inspection & Function Testing:
- Test ratchet spring levers to verify smooth pawl return and secure locking into blade notches.
- Inspect malleable blades for metal stress or surface cracking along frequent bend lines.
- Ensure post coupler clamping screws turn smoothly without binding.
- Steam Sterilization: Place organized components into perforated sterilization containers or sterilization wrap. Autoclave using standard pre-vacuum steam sterilization parameters (typically 134°C / 273°F for 4 to 5 minutes exposure time, followed by thorough drying).
Explore Our Complete Corporate Network
As a specialized global manufacturer of self-retaining surgical retractor systems, our corporate manufacturing network serves healthcare facilities, surgical centers, and medical distributors across multiple specialized surgical domains:
- Retractor Maker — Explore our complete corporate catalog of self-retaining retractor systems, specialized table-mounted systems, and custom OEM manufacturing capabilities across all surgical disciplines.
- Leyla Retractor — Discover our dedicated product line of specialized Leyla neurosurgical retractor systems, flexible holding arms, cranial fixation clamps, and neurosurgical accessories.
Frequently Asked Questions
How high above the patient’s skin should the Bookwalter ring frame sit?
The central ring frame should sit parallel to the body wall, approximately 2 to 3 inches (5 to 7.5 cm) above the skin line. This height provides sufficient clearance for ratchet housings without creating excessive blade flexion.
What is the correct order of assembly for a Bookwalter Retractor?
The proper assembly sequence is: (1) Mount the post coupler to the table rail; (2) Insert the vertical field post; (3) Attach the horizontal extension bar and flex bar; (4) Position and level the ring frame; (5) Clip ratchets onto the ring; and (6) Insert and tension retractor blades.
What should I do if the post coupler slips on the table rail during surgery?
Pause retraction immediately. Loosen tension on the blades, verify that the table rail clamp is positioned over an unencumbered rail segment without bunched drapes interfering with the channel, and re-tighten the main clamping knob firmly before re-tensioning blades.
What is the advantage of using a tilt ratchet over a standard ratchet?
A tilt ratchet features a gear hinge that allows the surgeon to tilt the blade shank upward or downward. This enables deep-cavity retraction and vertical tissue lift (e.g., under subcostal or pelvic borders) that standard flat ratchets cannot achieve.
How do I select between an oval ring frame and a segmented hinged ring frame?
Use an oval ring frame for standard flat abdominal surfaces and midline laparotomies. Use a segmented hinged ring frame for patients with curved abdominal contours, flank approaches, or deep pelvic access where the sides of the ring need to fold downward.
Can Bookwalter components be autoclaved assembled?
No. All components—including ratchets, blades, flex bar joints, posts, and couplers—must be fully disassembled prior to washing and autoclaving to ensure steam penetration across all contact surfaces and mechanical tracks.
Conclusion
Mastering the assembly and setup of the Bookwalter Retractor System is an essential skill for operating room personnel. By following a structured step-by-step assembly sequence—from table rail clamping to vertical elevation, overhead ring positioning, and balanced ratchet tensioning—surgical teams can establish static, hands-free exposure that enhances operative safety and efficiency.
Proper hardware inspection, height alignment, and systematic post-operative reprocessing preserve component integrity and ensure consistent performance across every surgical procedure.
To explore complete system setups, specialized retractor blades, or standalone replacement hardware, view our full catalog in the Bookwalter Retractors Category or review the primary Bookwalter Retractor System. You can also examine our corporate catalog at Retractor Maker and specialized neurosurgical solutions at Leyla Retractor.
Request Your B2B Quotation
Retractor Maker is a specialized manufacturer supplying factory-direct table-mounted retractor systems, replacement components, and surgical accessories to hospitals, surgical centers, medical distributors, and procurement teams worldid